Step 1
Download WordPress. Extract the zip and place the folder wherever you normally work on web sites - something like /User/username/Projects/wordpress
Step 2
Download MAMP. MAMP automatically comes with MAMP Pro (a free trial), but we can do everything we need without having to pay for MAMP Pro.
Step 3
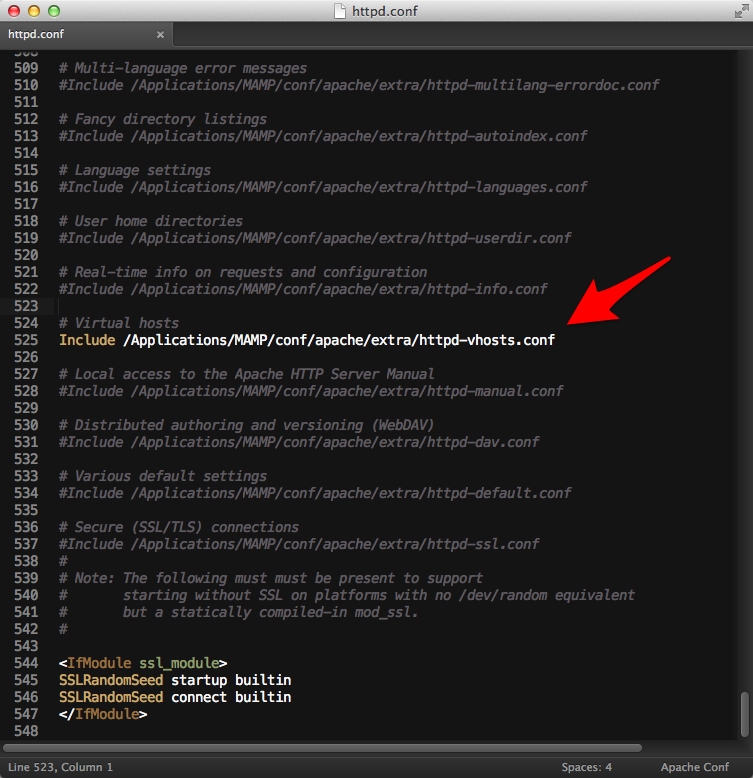
Open Applications/MAMP/conf/apache/httpd.conf in your text editor of choice.
Uncomment the line that says:
Include /Applications/MAMP/conf/apache/extra/httpd-vhosts.conf
Now open httpd-vhosts.conf and add a virtual host entry using the proper path to your WordPress folder (DocumentRoot) and a url of your choosing (ServerName). The file includes some example entries to use as a guide.
<VirtualHost *:80>
  DocumentRoot "/Users/kevinweeks/Projects/wordpress"
  ServerName local.wordpress
<VirtualHost>
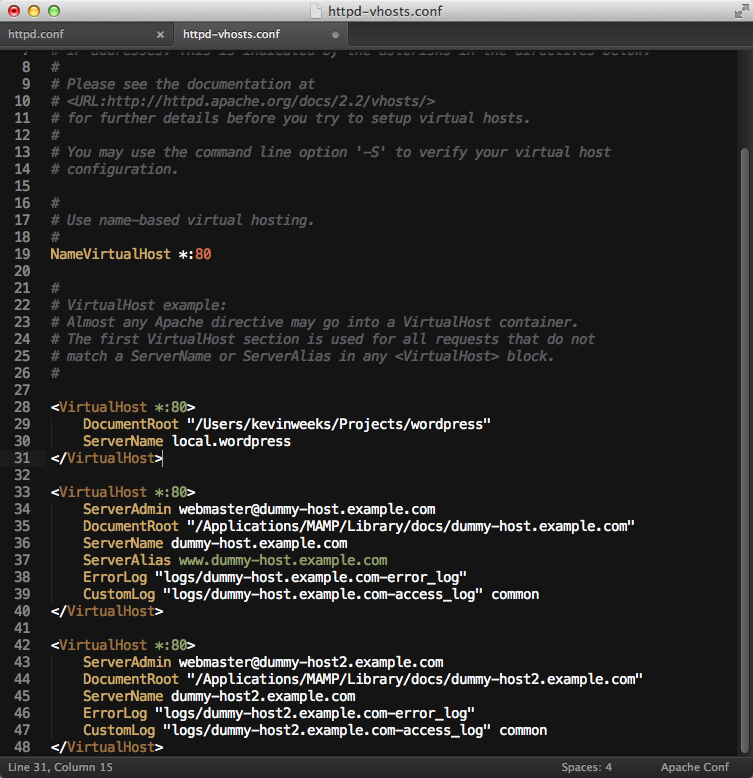
The :80 in VirtualHost indicates port 80. We’ll also set this value in MAMP’s preferences later.
Step 4
Add a new entry to your hosts file. Your hosts file exists whether or not you have MAMP installed, and is used to map hostnames to IP addresses.
Open Terminal and type:
sudo nano /etc/hosts
Go to the bottom of the file and add an entry:
127.0.0.1 local.wordpress
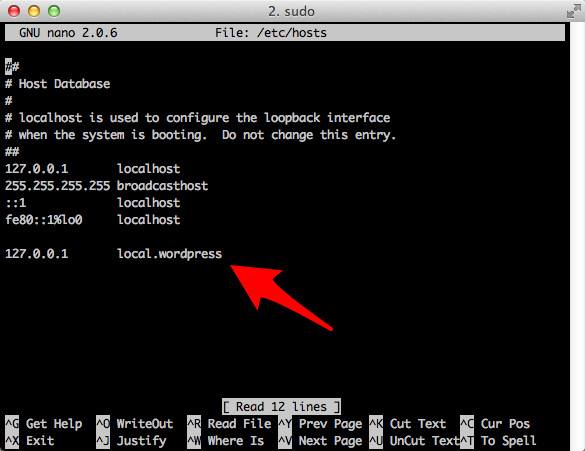
This says that when you go to local.wordpress in your browser, it should send you to 127.0.0.1 (back to your computer). This just sends us back, but we need MAMP to handle the rest.
Open MAMP and go into Preferences. Set the Apache Port to 80 (to match the VirtualHost Entry) and click OK.
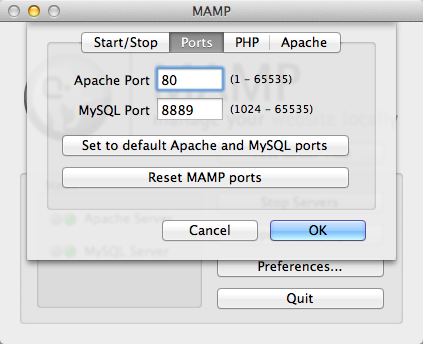
If the servers are running, click Stop Servers. You will know the servers are running if the two dots are green instead of red.

Click Start Servers. This should launch the start page, but if not, click Open start page.
Step 5
When you are on the start page, click phpMyAdmin at the top of the page. On this page, click databases.
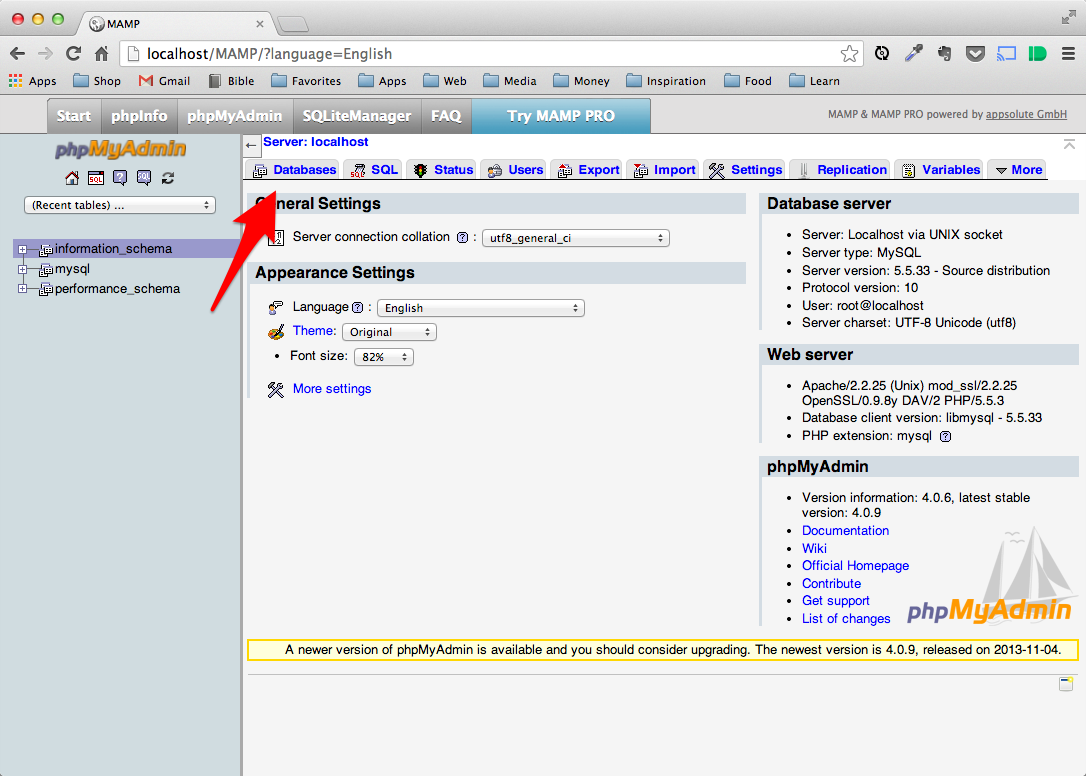
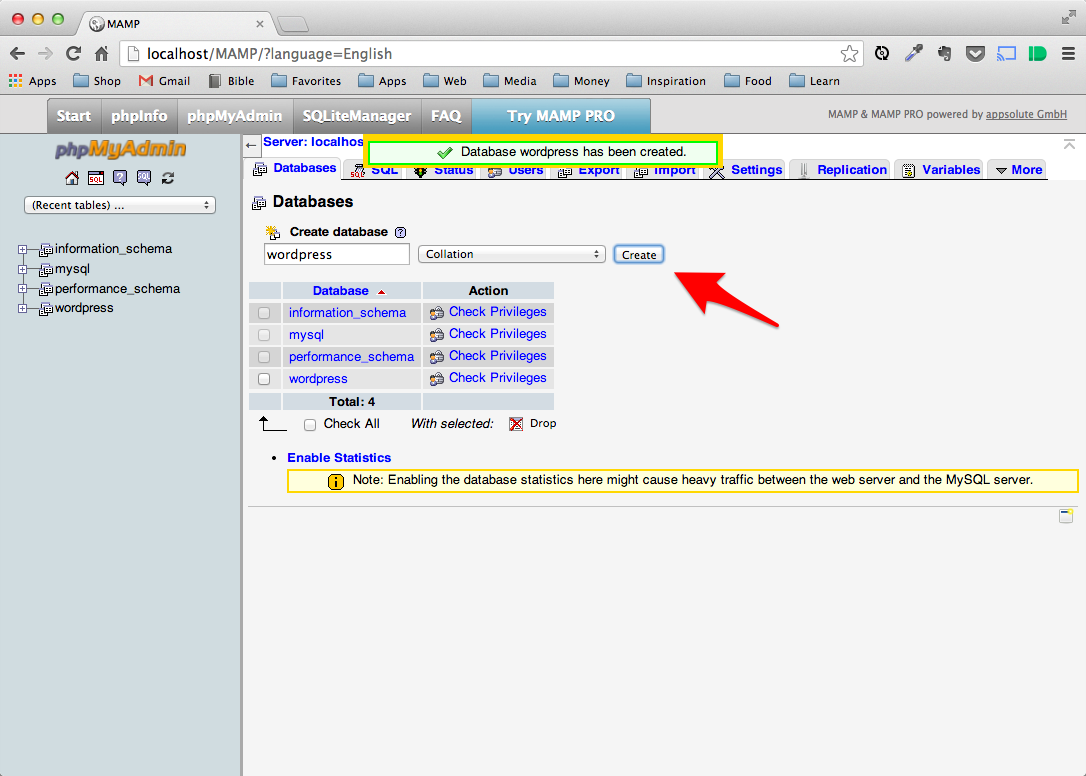
Then create a new database by typing in a name and clicking Create. I named mine “wordpress”.
In MAMP, click Stop Servers. Wait until both dots turn red, then click Start Servers. This ensures our recent changes take effect.
Step 6
Almost done! Now go to http://local.wordpress, or whatever you set as the name for your virtual host entry. Step through the WordPress setup (it is pretty straightforward, but if you get stuck, WordPress has documentation here).
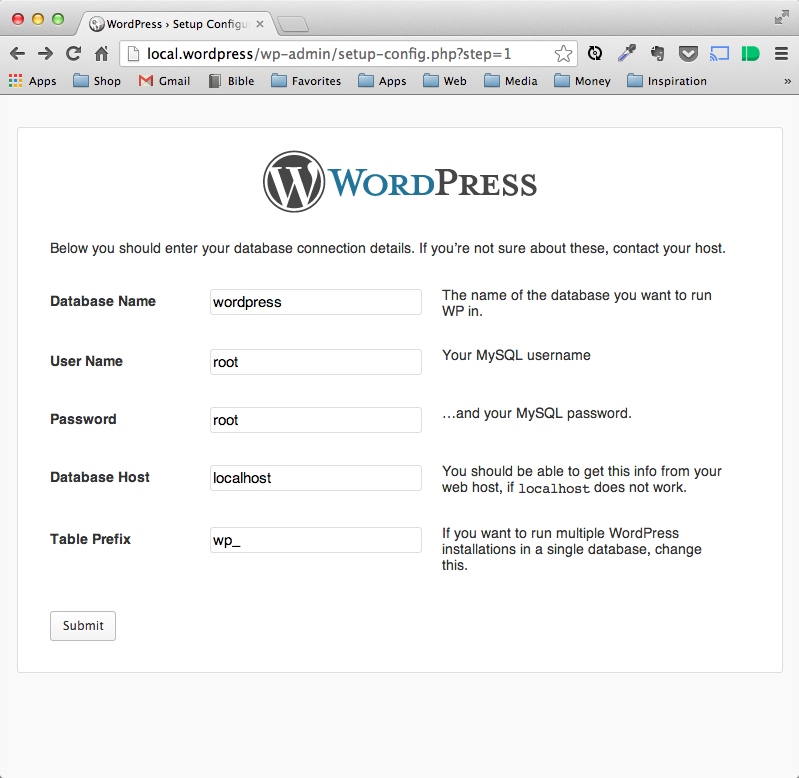
Your database name is whatever you called the database in phpMyAdmin. By default, the user name and password for the database are root and root. Lastly, create your WordPress admin user.
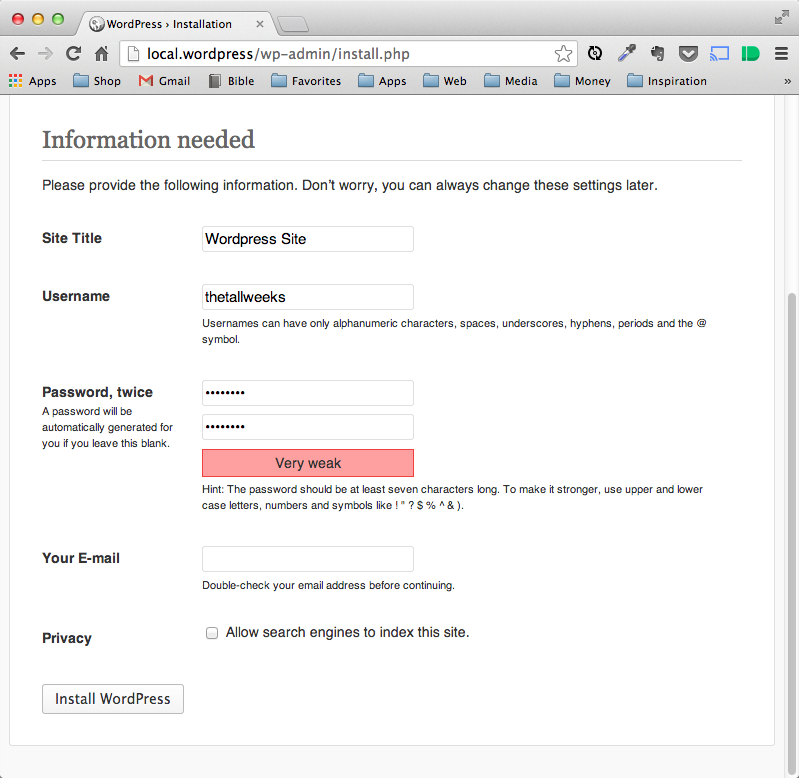
And there you go. You now have WordPress running on your local machine.
You can even set up other websites by creating separate VirtualHost entries in httpd-vhosts.conf and /etc/hosts and creating separate databases.
The best part is, you did it all for free!